Huntsmen Blog
Using Attractants
In an effort to get a leg up in the hunting world, using attractants to lure in large game such as deer and elk, has become popular, especially when combined with the use of a trail camera. There are lots of different natural and packaged attracts available and it’s important to decide what you want to use and why?
The main purpose for using attractants and trail cameras prior to the start of hunting season is to find out what kind and how many animals are in your prospective hunting area. It seems more logical to put up a tree stand in an area where you have absolute proof it has been frequented by the species you have a tag for. Otherwise, you might be sitting in an area void of the animal type you are looking for!

So, you found an area that shows signs of deer or elk and you want to put up a trail camera. What next? You have a couple options. You can use the natural foods that are around the area and let nature bring the animals in. Check out the vegetation in the surrounding area, see what the game you are looking for would be eating naturally and set up your camera with a view of that area. Some of the vegetation deer and elk will seek after include clover, flowering plants and grasses, berries, and acorns. Animals also require water, so if there is a water source nearby, consider setting up your camera in that vicinity with a good view of the watering hole. You might also look for game trails, keeping an eye out for those which cross streams. These are some options if you are just wanting to see what is normally in the area and follow the natural travel patterns of the animals.


Trail Cameras
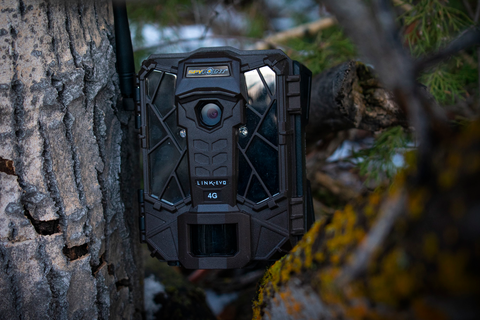
Trail cams were a great invention for the avid hunter. One of my favorite parts of the entire hunting experience is scouting! The challenge of finding the animal you’re hunting, watching, learning their travel pattern, what they are feeding on, how many there are, how big and are there any predators following them? So much knowledge can be gleaned from observation. I have a favorite tree stand in the woods, off the beaten path, where I like to go and spend a little time getting to know just what is in my neighborhood. Usually I see deer and elk, single animals, or small herds. Occasionally a momma and her young. One day a pair of young mountain lions with their mom strolled through and parked for a few minutes right under me. That got my adrenaline running just a little. The other thing I do when scouting is set out some trail cameras.

When hunting, you gotta put in the work if you want to harvest the trophy animal. Animals move around depending on the season, food availability and safety. Setting up a trail camera or two helps me to know exactly what is roaming through the hunting boundaries that I am considering. The intel provided by my trail cam pictures can help me put into play an effective harvesting plan. I know that I have to factor in the possibility of change. It seems like animals have an innate sense that tells them the exact day that a hunt starts, and what was there yesterday may be long gone on the first day of the hunt, but at least with trail camera pictures, I not flying in totally blind! One nice feature in some of the new cameras is the ability to receive pictures directly to your smart phone. You know what is circling around your camera without having to wait a week, hike up and retrieve your SD card, go back home and plug it into your computer only to find out the area is a dud! Being able to see in real time what is coming within range of your camera is great, and if you aren’t receiving very many pictures, instead of hiking up to retrieve an SD card, you might know that it’s time to just move the whole setup.
When putting up a trail camera, a few good tips to remember include 1) pointing your trail camera due north whenever possible to avoid poor exposure, backlighting, the sun tripping your camera or possible sun glare; 2) angle your camera at about 45 degrees down the game trail to get a wider field of view to see the animals coming and going; 3) before placing your camera, be sure to wipe it down with a scent eliminator to remove all smells; and 4) depending on the species, attractants can be a useful tool. We have found in our area that berry scented attractants work great for elk and apple scents work best on mule deer.

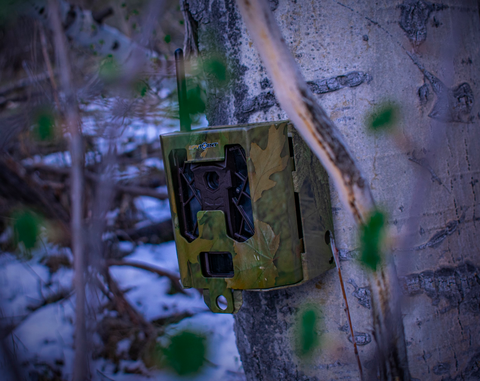
When setting out trail cameras, there are some common sense etiquette rules that should be followed. First, respect private property. Don’t set your camera up on someone’s private property, especially if it is clearly marked. If you see someone out putting up a camera, don’t follow them. And if you come across someone else’s camera, again, be respectful. Don’t sabotage their efforts. Out of courtesy, don’t ask where someone set up their cameras. Find your own spots. If they want you to know, they will volunteer the information. It’s a good idea to set your camera up somewhere off the beaten path. You might have to do a little hiking, but it will lessen the likelihood of your equipment being vandalized or stolen. Lastly, when you put out a camera, be sure to secure it. Unfortunately in these times, stuff does go missing. If someone wants your camera bad enough they will take it, but make it as hard for them as you can!
Whether you are hunting for that trophy buck, or to put meat in the freezer, your hunting experience should be enjoyable, and success always make the experience that much better. Proper planning, preparation and a trail camera can all help to increase your chances of being successful during your hunt. We at Huntsmen Outdoors wish you a successful, enjoyable hunting experience!


